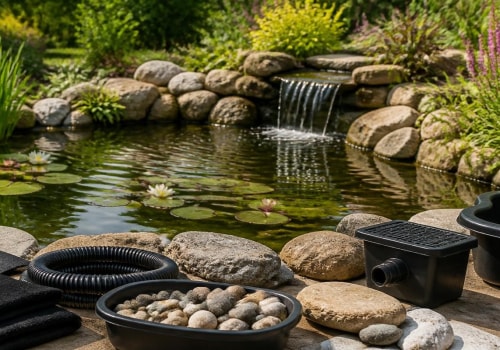
When it comes to garden pond installation, one often overlooked aspect is the role of pond lighting. Proper lighting not only enhances the visual appeal of your pond but also serves practical purposes that can elevate your outdoor space. Imagine a serene evening where the gentle glow of lights reflects off the water's surface, creating a magical atmosphere that invites relaxation and contemplation. This transformation is just one of the many benefits that effective pond lighting can bring to your garden. The importance of pond lighting extends beyond aesthetics; it also plays a crucial role in safety and functionality.
Well-placed lights can illuminate pathways, ensuring that you and your guests can navigate your garden safely after dark. Additionally, lighting can highlight specific features of your pond, such as waterfalls or aquatic plants, drawing attention to the natural beauty of your landscape. This not only enhances the overall experience but also allows you to enjoy your garden pond at any hour. Moreover, the right lighting can create a sense of depth and dimension in your garden pond, making it appear more inviting and expansive. By strategically placing lights underwater or around the perimeter, you can create stunning visual effects that change with the time of day.
Whether you prefer a soft, ambient glow or vibrant colors that dance across the water, garden pond lighting offers endless possibilities for customization. As we delve deeper into this topic, you'll discover how to choose and install lighting that complements your garden's unique style while maximizing its beauty and functionality.
Planning Your Pond Lighting Installation
When it comes to pond lighting installation, careful planning is essential to achieve the desired effect while enhancing the beauty of your garden pond. Start by assessing the layout of your pond. Consider its size, shape, and surrounding landscape.Take note of any natural features, such as trees or rocks, that could influence lighting placement.Next, determine the ambiance you wish to create. Do you want a tranquil, serene atmosphere for evening relaxation, or a vibrant, lively setting for entertaining guests? Your vision will guide your choices in lighting design.
Choosing the Right Fixtures
Selecting appropriate lighting fixtures is crucial. Here are some tips:- Submersible Lights: Ideal for illuminating the water itself, creating a magical glow.
- Spotlights: Use these to highlight specific features like waterfalls or unique plants.
- Path Lights: These can guide visitors safely around your pond area.
- Floating Lights: Perfect for adding a whimsical touch to your pond.
Mark where each fixture will go and how they will be powered. This will help you visualize the overall effect and ensure that all areas are adequately lit without overwhelming the natural beauty of your garden pond.
Choosing the Right Lighting Fixtures
When it comes to garden pond installation, selecting the right lighting fixtures is crucial for enhancing the beauty and safety of your outdoor space. There are several types of pond lights available, each offering unique benefits and aesthetics.- Submersible Lights: These lights are designed to be placed underwater, illuminating the pond from below. They create stunning reflections and highlight aquatic plants and fish.
- Surface Lights: Positioned around the pond's edge, these lights shine down into the water, providing a warm glow that enhances the overall ambiance.
- Floating Lights: Ideal for adding a whimsical touch, floating lights can drift on the surface of the water, creating a magical atmosphere during nighttime.
- Energy Efficiency: LED lights consume significantly less energy compared to halogen options, making them a more sustainable choice for long-term use.
- Lifespan: LEDs typically last much longer than halogen bulbs, reducing the frequency of replacements and maintenance.
- Brightness and Color Options: LEDs offer a variety of colors and brightness levels, allowing you to customize your pond's lighting to suit your style.
Look for lights with a high IP (Ingress Protection) rating, which indicates their resistance to water and dust. This feature will not only prolong the life of your lighting but also ensure safety when submerged or exposed to moisture.In summary, selecting the right lighting fixtures for your garden pond involves understanding the different types available, weighing the pros and cons of LED versus halogen options, and prioritizing waterproof features for longevity and safety.
Essential Tools and Materials for Installation
Installing pond lighting can transform your garden pond into a stunning nighttime oasis. To ensure a smooth installation process, it’s essential to gather the right tools and materials beforehand. Below is a comprehensive list of what you will need.Essential Tools
- Wire Cutters: Necessary for cutting electrical wires to the desired length.
- Screwdriver: A standard or Phillips screwdriver will help secure fixtures and connections.
- Drill: If you need to create holes for mounting lights, a drill is indispensable.
- Measuring Tape: Use this to measure distances accurately for light placement.
- Level: Ensures that your lights are installed evenly, providing a professional look.
Materials Needed
- Pond Lights: Choose waterproof and submersible lights designed specifically for outdoor use.
- Cabling: Use outdoor-rated electrical cable to connect your lights to the power source safely.
- Transformers: A transformer is necessary if you are using low-voltage lights; it converts standard voltage to a lower voltage suitable for pond lighting.
- Ground Stakes or Mounting Brackets: These will help secure your lights in place, especially if they are above water.
- Electrical Tape: Essential for insulating wire connections and ensuring safety from moisture.
Proper preparation not only saves time but also enhances the overall quality of your project, allowing you to enjoy your beautifully illuminated garden pond for years to come.
Step-by-Step Installation Process
Installing pond lighting can enhance the beauty of your garden pond while providing safety and ambiance during the evening hours. Follow these step-by-step installation steps to ensure a successful DIY pond light setup.- Plan Your Lighting Layout: Before you begin, take some time to plan where you want to place your lights. Consider highlighting features such as waterfalls, plants, or the pond's edge. Sketch a layout to visualize the placement.
- Choose the Right Lights: Select lights that are specifically designed for outdoor use and are waterproof.
LED lights are a popular choice due to their energy efficiency and longevity.
- Gather Your Tools: You will need a few basic tools for installation, including a shovel (if burying cables), wire connectors, and possibly a transformer if using low-voltage lights.
- Ensure Safety First: Always turn off power sources before starting your installation. If you're working with electrical components, consider consulting a professional electrician to ensure safety.
- Install the Lights: Begin by placing the lights in your predetermined locations. If you’re using submersible lights, ensure they are fully submerged according to the manufacturer's instructions. For above-water lights, secure them in place using stakes or brackets.
- Run the Wiring: Carefully run the wiring from each light back to your power source.
If burying cables, dig a shallow trench about 6 inches deep to protect them from damage.
- Connect the Lights: Use wire connectors to attach the lights to the power source. Ensure all connections are secure and waterproofed to prevent any electrical issues.
- Test Your Setup: Once everything is connected, turn on the power to test your lights. Adjust their positions if necessary to achieve the desired effect.
Common Mistakes to Avoid During Installation
Installing pond lighting can significantly enhance the beauty of your garden pond, but there are several common mistakes that DIYers often make during the installation process.Avoiding these pitfalls will help ensure a successful and visually appealing setup.
- Neglecting Proper Planning: One of the most frequent errors is failing to plan the layout of your pond lights. Before installation, take time to sketch out where you want the lights placed. Consider factors such as visibility, the type of plants around the pond, and how the lights will interact with water features.
- Choosing Inappropriate Lighting: Not all lights are suitable for outdoor use, especially near water. Ensure you select waterproof and submersible lights designed specifically for pond environments.
Using indoor lights can lead to electrical hazards and damage.
- Ignoring Electrical Safety: When installing pond lighting, it’s crucial to follow safety guidelines. Always use a GFCI (Ground Fault Circuit Interrupter) outlet to prevent electrical shocks. Additionally, ensure that all wiring is buried at least 12 inches underground to avoid accidental damage.
- Overlooking Light Placement: Improper placement can lead to uneven lighting or shadows that detract from your pond's beauty. Aim to highlight key features such as waterfalls or plants while avoiding direct glare into your eyes or reflections on the water surface.
- Forgetting About Maintenance: After installation, many forget about maintenance.
Regularly check your lights for any signs of wear or damage, and clean them periodically to ensure optimal performance.
Maintaining Your Pond Lighting System
Maintaining your pond lighting system is essential for ensuring its longevity and optimal performance.Regular care not only enhances the aesthetic appeal of your garden pond but also prevents costly repairs or replacements.
Regular Cleaning
One of the most important aspects of pond light maintenance is keeping the fixtures clean. Over time, algae, dirt, and debris can accumulate on the lights, diminishing their brightness and effectiveness. To clean your pond lights:- Turn off the power to the lights before cleaning.
- Use a soft cloth or sponge with mild soap and water to gently scrub the surfaces.
- For underwater lights, consider using a brush designed for aquatic environments to avoid damaging the fixtures.
Inspecting for Damage
Regular inspections are crucial for identifying any signs of wear or damage. Check for:- Cables that may be frayed or exposed.
- Cracks or leaks in the light fixtures.
- Corrosion on metal components.
Replacing damaged parts early can save you from more extensive repairs later.
Seasonal Adjustments
As seasons change, so do the conditions around your garden pond. In colder months, it’s advisable to:- Remove any floating debris that could block light fixtures.
- Consider bringing above-water lights indoors to protect them from freezing temperatures.
Prolonging Light Lifespan
To extend the life of your pond lights:- Choose energy-efficient LED lights, which not only consume less power but also last significantly longer than traditional bulbs.
- Utilize timers or smart controllers to manage lighting schedules, reducing unnecessary usage.
Frequently Asked Questions About Pond Lighting Installation
When it comes to pond lighting installation, many homeowners have questions about the best practices, potential issues, and maintenance. Here are some frequently asked questions that can help guide you through the process.What types of lights are best for garden ponds?
There are several types of lights suitable for garden ponds, including:- Submersible lights: These are designed to be placed underwater and can create stunning effects.
- Floating lights: Ideal for illuminating the surface of the water, these lights can add a magical touch.
- Spotlights: Used to highlight specific features around the pond, such as plants or waterfalls.
How do I install pond lights safely?
To ensure a safe installation of your pond lights, follow these steps:- Choose low-voltage lighting to minimize electrical hazards.
- Use waterproof connectors and fixtures to prevent water damage.
- Ensure all wiring is buried or protected from exposure to water.
What should I do if my pond lights are not working?
If you encounter issues with your pond lights, consider these troubleshooting tips:- Check the power source: Ensure that the circuit is functioning and that the transformer is plugged in.
- Inspect connections: Look for loose or corroded connections that may disrupt power.
- Test bulbs: Replace any burnt-out bulbs to restore functionality.
Conclusion: Transforming Your Garden with Pond Lighting
In conclusion, installing pond lighting is a transformative step that can elevate the aesthetic appeal and functionality of your garden pond.Throughout this article, we have explored various aspects of garden pond installation, emphasizing the importance of proper lighting to enhance the beauty of your outdoor space.By strategically placing lights around your pond, you not only create a stunning visual effect but also improve safety during nighttime. The right lighting can highlight the natural features of your pond, such as aquatic plants and fish, making them more visible and enjoyable after dark.
- Safety: Well-placed lights can prevent accidents by illuminating pathways and edges.
- Aesthetics: Lighting adds a magical ambiance, turning your garden into a serene retreat.
- Wildlife Attraction: Certain lights can attract beneficial wildlife, enhancing the ecosystem of your pond.
Embrace this opportunity to create a captivating atmosphere that invites relaxation and enjoyment for you and your guests.